
Your Healing Foodie
My journey of health, wellness & balance through diet, detox, remedies, and prayer
DIY – HEALTHY GRASS-FED BEEF TALLOW

Tallow has been used safely and healthily for hundreds of years for frying, baking and more and in moderation can still be considered a healthy fat to cook with. It can be time consuming to make but with cheap access to healthy grass fed suet, or kidney fat, you simply cannot go wrong.
Grass-fed beef fat is a great source of oleic acid, conjugated linoleic acid (CLA) and other fatty acids that are thought to increase “good” cholesterol, support brain health and a strong metabolism.
1. What exactly is Tallow?
Tallow is fat rendered from beef and is solid at room temperature but melts into a liquid when heated.
2. Nutrition Facts
U.S. Department of Agriculture claims that 1 TBSP of tallow has an estimated
115 calories
13 g. of fat (including 6.5 g. saturated fat and 5.5 g. of monounsaturated fat)
0 g. of carbs, protein, sugar or fiber
Tallow contains Vitamins
- Vitamins A, D, K, E and B12,
Tallow also contains Nutrients
- Niacin, Selenium, Iron, Phosphorus, potassium and riboflavin.
Tallow is rich in Fatty acids and helps you absorb more nutrients from your food.
- Choline
- Fatty Acids such as
- CLA
- oleic acid,
- palmitoleic acid,
- stearic acid,
- conjugated linoleic acid
- and others
Tallow May Support a Healthy Weight being rich in CLA, a fatty acid and supports a healthy metabolism. Consuming healthy Beef Tallow stimulates the release of glucagon, the hormone that signals to your body that it’s time to burn stored fat (visceral body fat) to use for energy leading to weight loss.
Talllow Helps You Absorb Essential Vitamins as fats in your diet are needed to absorb fat-soluble essential vitamins that help support your immune system, skeletal system, heart, skin and more such as vitamins A, D, E and K.
Tallow is a Healthy Source of Fats, Including Cholesterol and similar to the type of fat found in olive oil and is thought to have a little effect on blood cholesterol levels, or even possess the ability to raise HDL cholesterol, the good stuff and had been shown to reduce obesity-related type 2 diabetes in some cases. It also contains a beneficial ratio of Omega 3 and Omega 6 fats. Therefore, it may provide some benefits, such as supplying you with fats and cholesterol that are needed to fuel the brain and produce hormones.
Estimated Fat Content
- 45 to 50 % Saturated fat
- 42 to 50 % Monounsaturated fat
- 4 % Polyunsaturated fat
Tallow Reduces inflammation – tallow contains conjugated linoleic acid, which is a natural anti-inflammatory.
Healthy oils, such as coconut oil and avocado oil, can also supply you with a mix of healthy fats. However, you would do well to avoid refined vegetable oils as they may be rancid due to exposure to high heat and are very high in pro-inflammatory omega-6 fatty acids.
Grass-fed cattle provide the highest-quality beef tallow in terms of nutrients and tend to store more omega-3s, CLA and other beneficial compounds in their bodies in comparison to those cows raised in typical feedlots and grain diets.
3. Tallow has a High Smoke Point
Tallow has one of the highest smoke point of cooking oils of around 400–420 degrees. Smoke point is the temperature at which an oil starts to burn, smoke and lose many of its nutritional benefits and chemical compositions may change. Thus tallow can be used at high temperature while avoiding problems such as free radicals.
4. Tallow May Help Hydrate Skin
Consuming fats like tallow can help support the skin and can also be applied with benefits topically.
5. Ways to Use
Tallow’s high smoke point, between 400–420 degrees, makes it perfect for frying, baking, sauteing and roasting.
Popular cooking uses for tallow:
- Flour tortillas
- Mexican recipes, plantains and tamales
- Biscuits
- Fried meats
- Fried vegetables
- Fry bread
Soaps and Skin care uses:
- Tallow Soap was traditionally used. With many soap bars being made with tallow, since it helps harden and lather soap while also supporting skin’s natural barrier.
This content is for informational and educational purposes only. It is not intended to provide medical advice or to take the place of such advice or treatment from a personal physician. All readers of this content are advised to consult their doctors or qualified health professionals regarding specific health questions. Neither this writer nor the publisher of this content takes responsibility for possible health consequences of any person or persons reading or following the information in this educational content. All readers of this content, especially those taking prescription or over-the-counter medications, should consult their physicians before beginning any nutrition, supplement or lifestyle program.
Risks and Side Effects
There is alot evidence stating that natural animal fats may actually be healthier than partially hydrogenated vegetable shortenings, especially the kinds that contain trans fats, which have been linked to conditions including heart disease.
Finding high-quality tallow from grass-fed cattle is important to avoid hormones, antibiotics and more. It’s important to avoid hydrogenated animal fats (meaning they contain not only cholesterol and saturated fat, but also dangerous trans fats). Making your own tallow from a local grass fed beef is a healthy alternative.
If you are at high risk of heart disease and have a history of high cholesterol, consider limiting your use of pure animal fats and consider consulting your doctor.
HOW TO RENDER BEEF FAT INTO TALLOW
CROCKPOT OR STOVE TOP METHODS
The oven method is just too messy and complicated but an option.
1 crockpot full of fat renders 3 quarts of finished beef tallow.
STEP 1: GET BEEF FAT
BEEF FAT FROM THE BUTCHER
- Contact your local butcher and ask for the kidney and or other organ fat off of their beef – grass fed and finished beef that is antibiotic and hormone free is important (plan to pick it up promptly as they toss a ton of this stuff). This can be very low cost or free.
- If you have your own beef at the butcher or home butchered, you can ask them to set aside the fat and organs for you. Kidney fat makes for great clean fat.
- Set it out for 15-30 mins prior to working with it if frozen. If fresh, freeze overnight and set out before gathering supplies.

STEP 2: SUPPLIES YOU NEED
BEEF PREP SUPPLIES
GATHER THE FOLLOWING AND PREPARE TO GET REALLY MESSY
- Cutting board
- Large sharp knife
- Crock pot (easiest), or large stock pot.
- (Optional) a Stick blender
- Frozen beef fat of the kidney set out 30 mins prior to cutting
- Garbage can or bowl for scraps
- Small and Large ziplock bags or other way to store any preferred organs
- Paper towels and other cleaning supplies
- Easy access to hot water and soap
- Kitchen towel for drying your hands
STORAGE AND CLEANUP SUPPLIES
SET ASIDE THE FOLLOWING OR GATHER WHILE RENDERING (FOR STEP 8)
- Clean WIDE MOUTH/FREEZER SAFE canning jars, canning funnel, lids and rings or something to store and freeze rendered fat in.
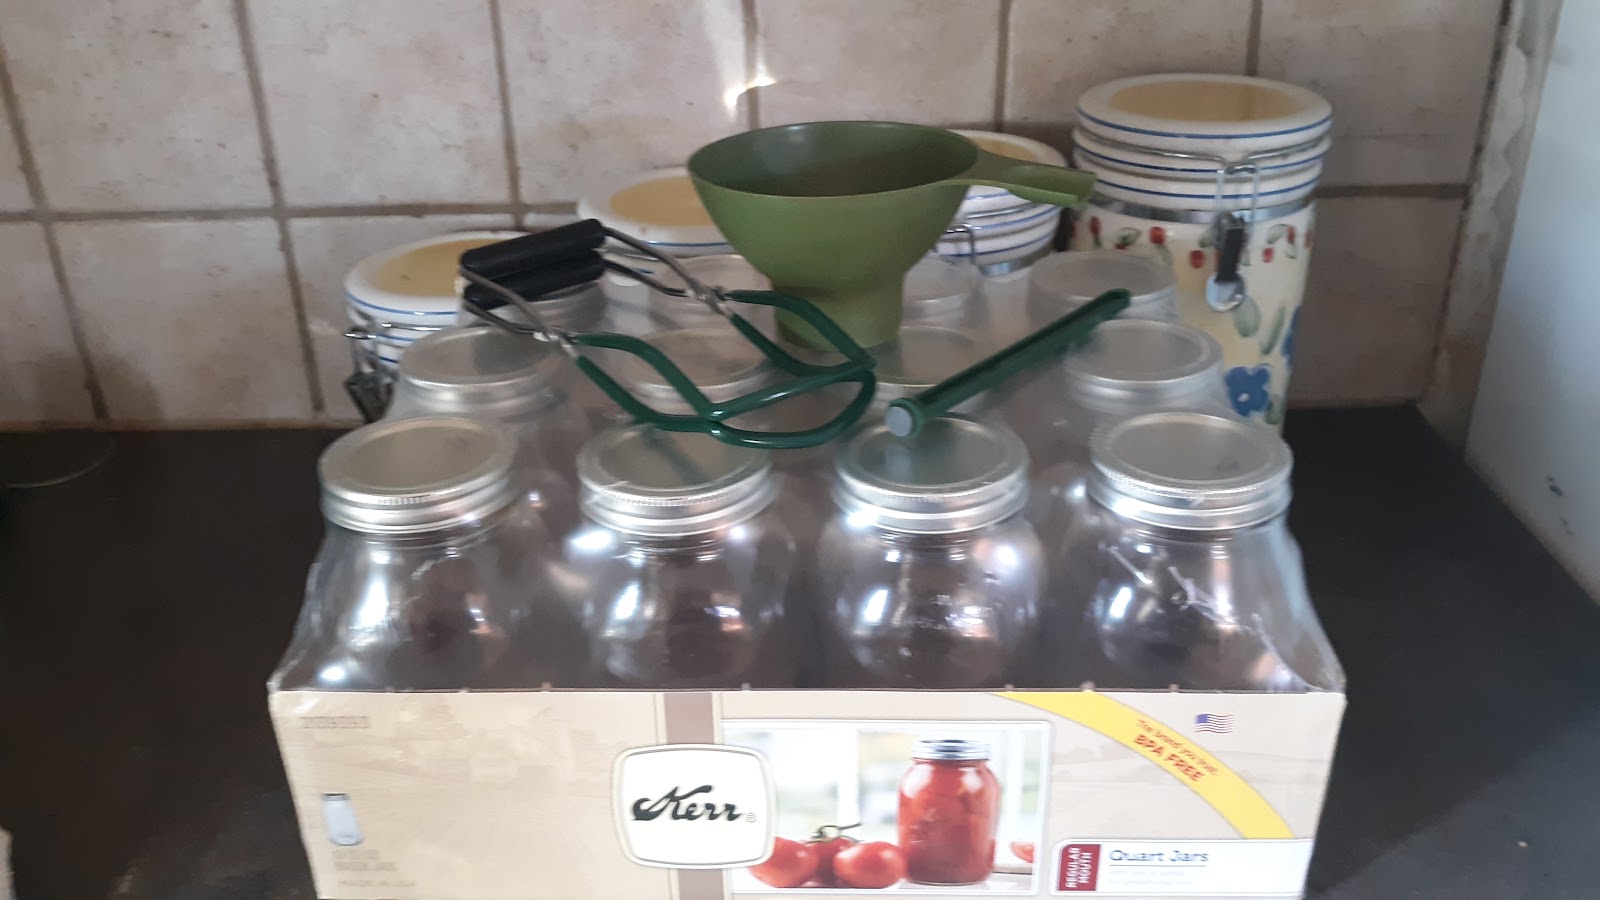
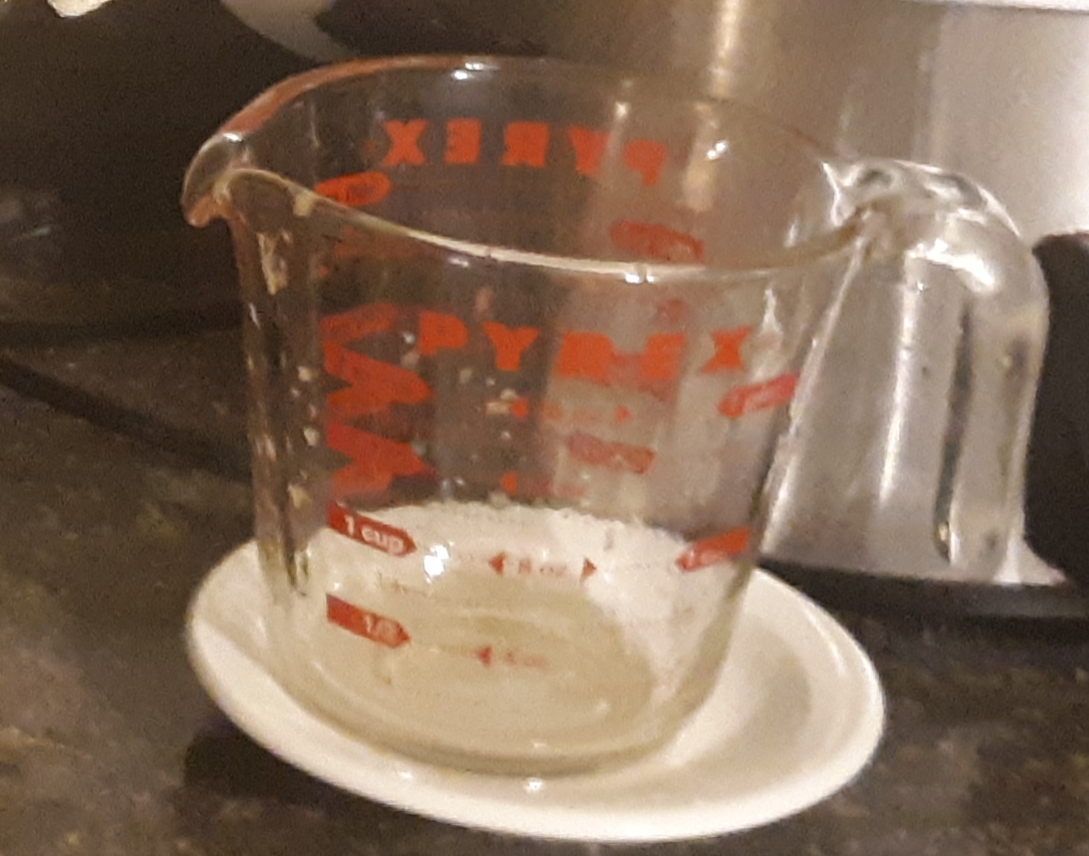
- A measuring cup or scoop, and plate to set it on.
- Large stock pot with hot water for heating jars and lids (a canning pot works well for this) OR if you just want to throw the jars in the dishwasher on a sanitizing setting right before use, that works too. OR heat in the oven at 280° for
- A large piece of cheesecloth or other fine staining method cut to fit your large bowl. (FIRST STRAINING)
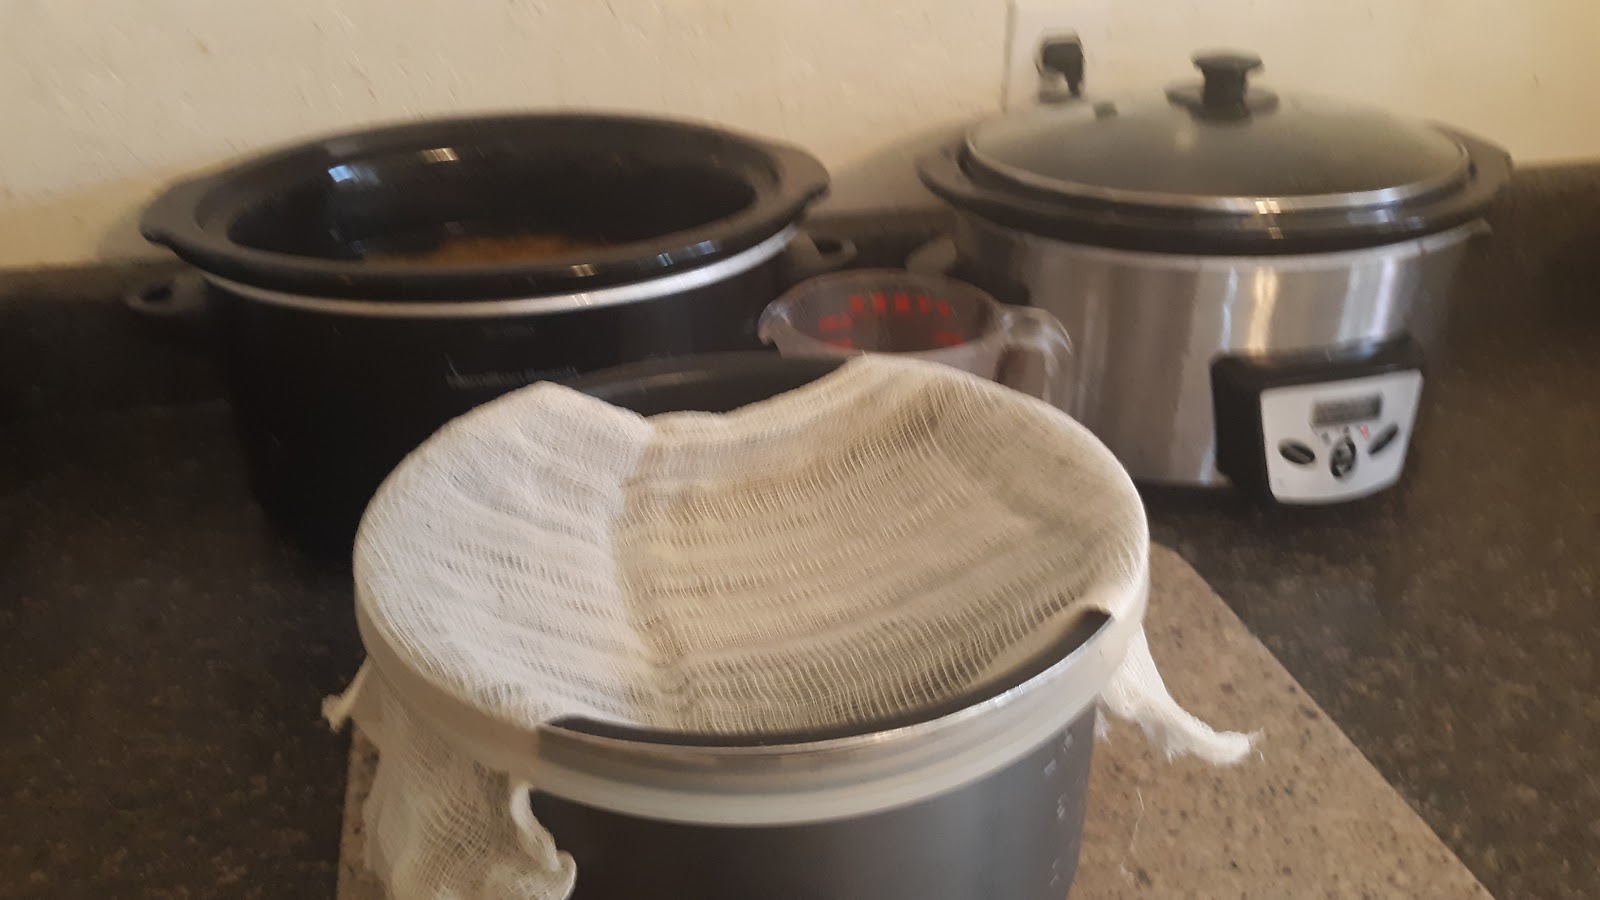
- A large bowl and a rubber band or something to secure cheesecloth or mesh cloth around the rim for the first filtering. (I use my instapot and the rubber lid seal (pictured in STEP 10)
- A small piece of cheesecloth to double over your canning funnel and jar. (SECOND STRAINING)
- A bowl for filtered chunks to discard.
- OPTIONAL: A second crock pot for rendering and heating excess filtered fat chunks OR a pot to keep removed fat chunks warm while filling jars.
- Several clean kitchen towels (not your favorite ones as you may get lots of grease on them your first time.
- A roll of paper towels.
- Hot pads or cloth kitchen gloves
- Kitchen towel for drying your hands
STEP 3: TURN ON THE CROCK POT TO LOW or set up a stock pot on the stove.
STEP 4: CUT THE FAT UP INTO SMALL PIECES
KIDNEY FAT: BEFORE a nice piece of kidney fat
(not all pieces are this clean and nice to work with)
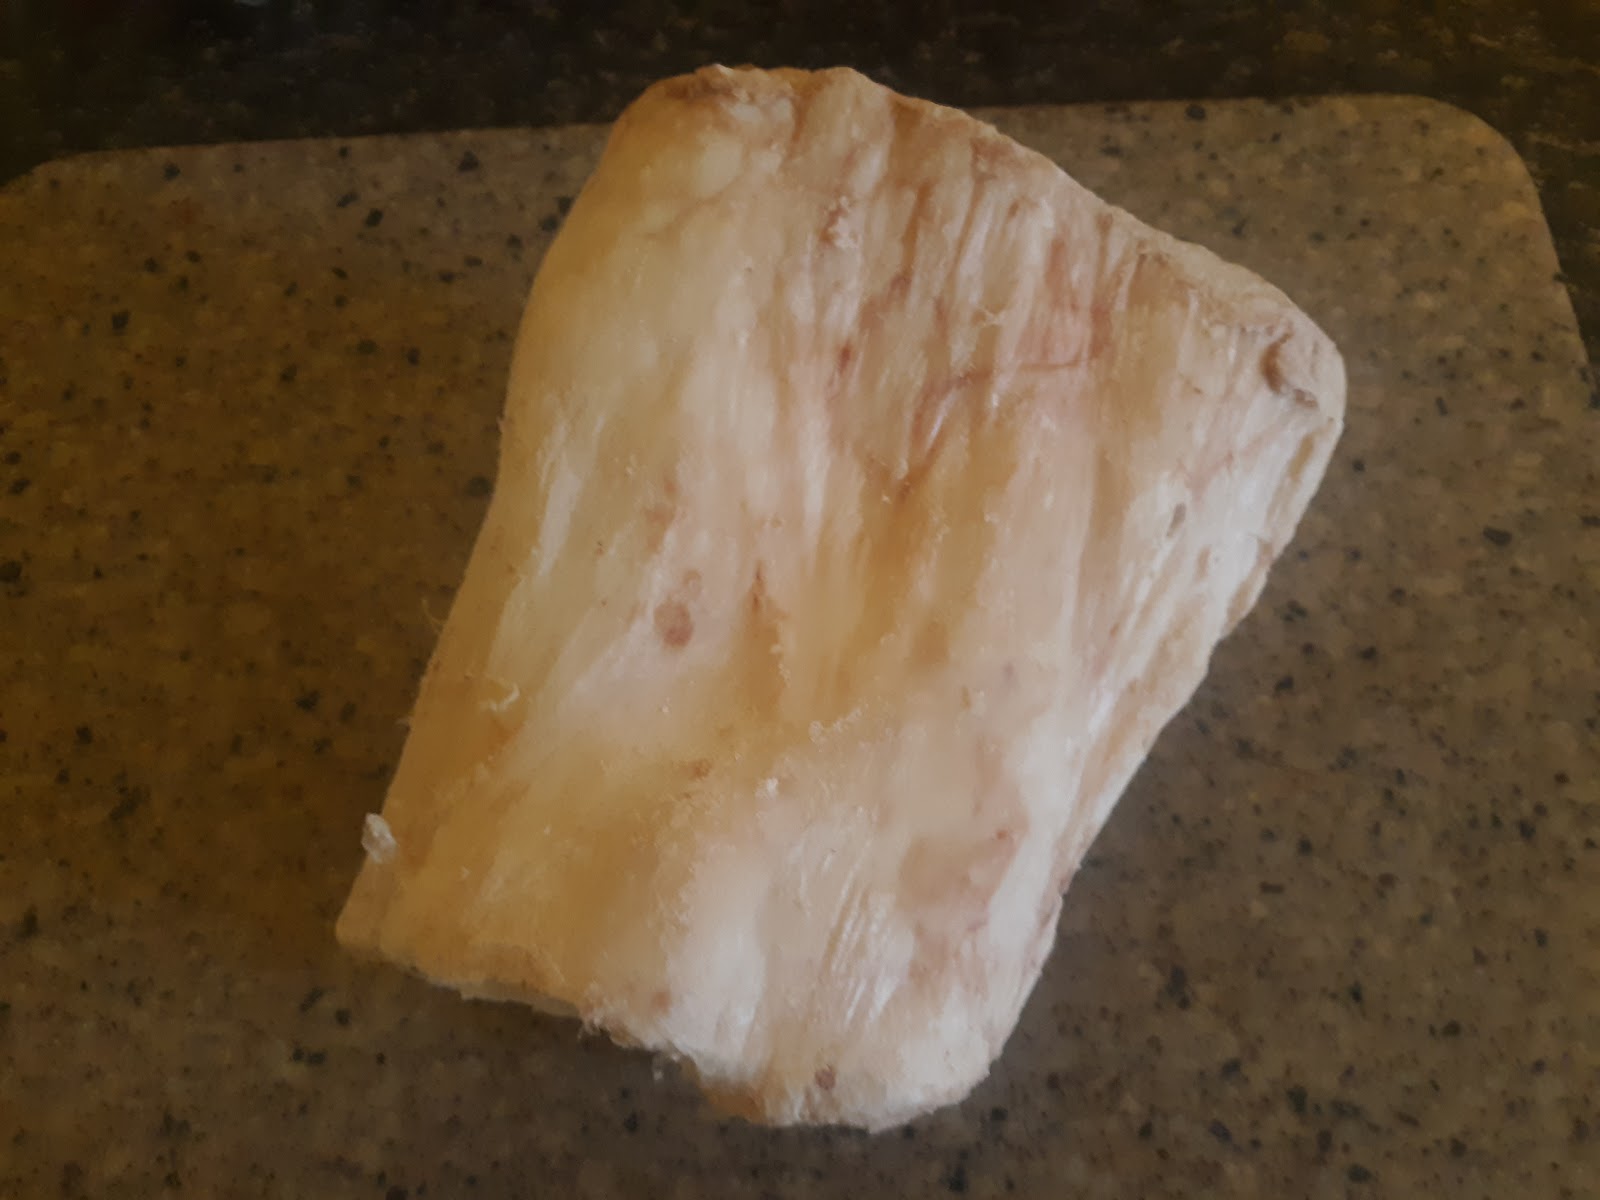
- Frozen beef that has been set out for 15-30 mins is easiest to work with
- Start in a clean area with all your cutting board, knife, bowl for scraps, fat, stick blender, ziplocks (unseal them and have them ready-you will be greasy) clean towel and paper towels.
- Cut the fat into small pieces. The smaller the pieces, the faster the process
- Cut out all meat, organs or impurities and only use fat pieces (IF YOU CANNOT GET IT ALL OUT THAT IS OK. BUT GET AS MUCH AS YOU CAN)
- Fill the crockpot with the fat pieces as you go.
- Set aside any organs that you may want later (freeze or refrigerate as soon as possible) have someone on hand to assist with the ziplock bags if needed as you will be very greasy.

AFTER kidney cut out of fat
STEP 5: FILL THE POT
- I like to fill the pot as I go with the heat on lowest setting
- Once the pot is full discard or freeze any remaining fat for next time or get another one going.
FILL THE CROCK OR POT FULL OF FAT
STEP 6: CLEAN UP AND PREPARE THE SET ASIDE ITEMS LISTED IN STEP 2 for filtering
- You may need paper towels, washcloths with grease fighting soap and/or very hot water to clean everything up
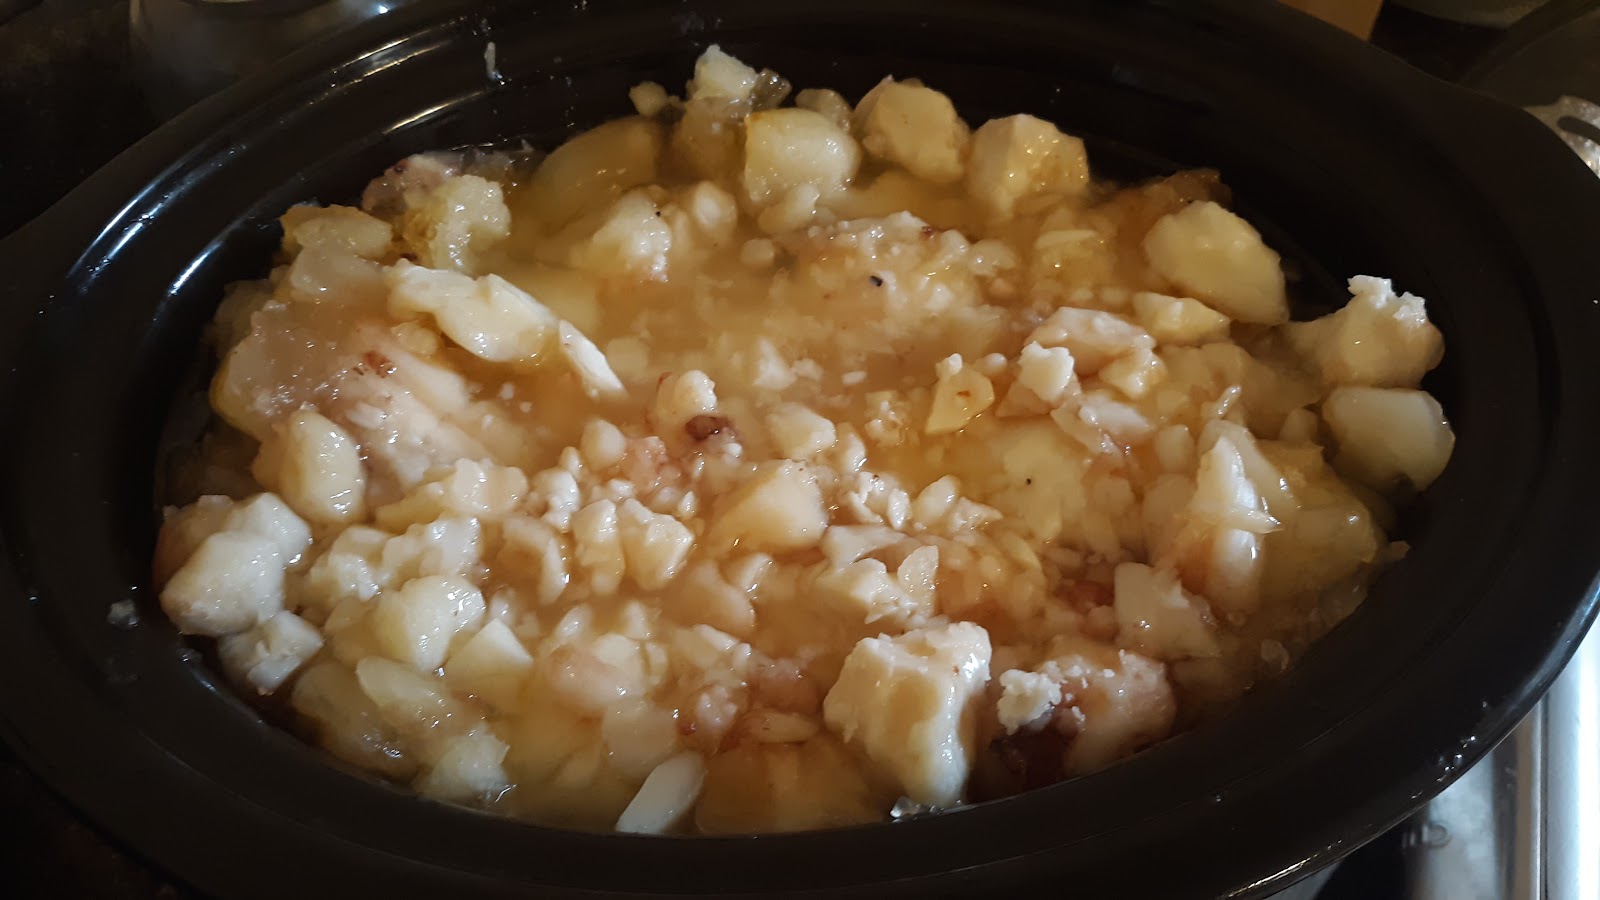
STEP 7: LET COOK DOWN (DO NOT LET IT BOIL)
- Let it cook down about 6-8 hours in a crock pot or until fat is no longer white
- Check and stir about every hour (more if in the oven)
- Turn down heat setting if it started to boil
- After the pieces are soft, I like to break the pieces down more by using a stick blender if chunks are small enough. (BE CAREFUL NOT TO SPILL OVER OR RAISE STICK WHILE BLENDING)
BEFORE stick blending DURING stick blending

AFTER stick blending
STEP 8: SET OUT ALL THE SUPPLIES GATHERED AND SET ASIDE FROM STEP 2
- Clean WIDE MOUTH/FREEZER SAFE canning jars, canning funnel, lids and rings or something to store and freeze rendered fat in.
- A ladle, and plate to set it on
- Large stock pot with hot water (a canning pot works well for this) OR if you just want to throw the jars and lids in the dishwasher on a sanitizing setting right before use, that works too.
- Cheesecloth or other fine straining method
- Bowl for filtered chunks to discard
STEP 9: TALLOW IS COMPLETE
- Tallow has completely rendered when it crackles
- Heat up your jars and lids
- Ensure they are clean and dry (a paper towel or clean lint free cloth works nicely for this)
- Place canning funneling into the jar and top with a cheesecloth or other staining method
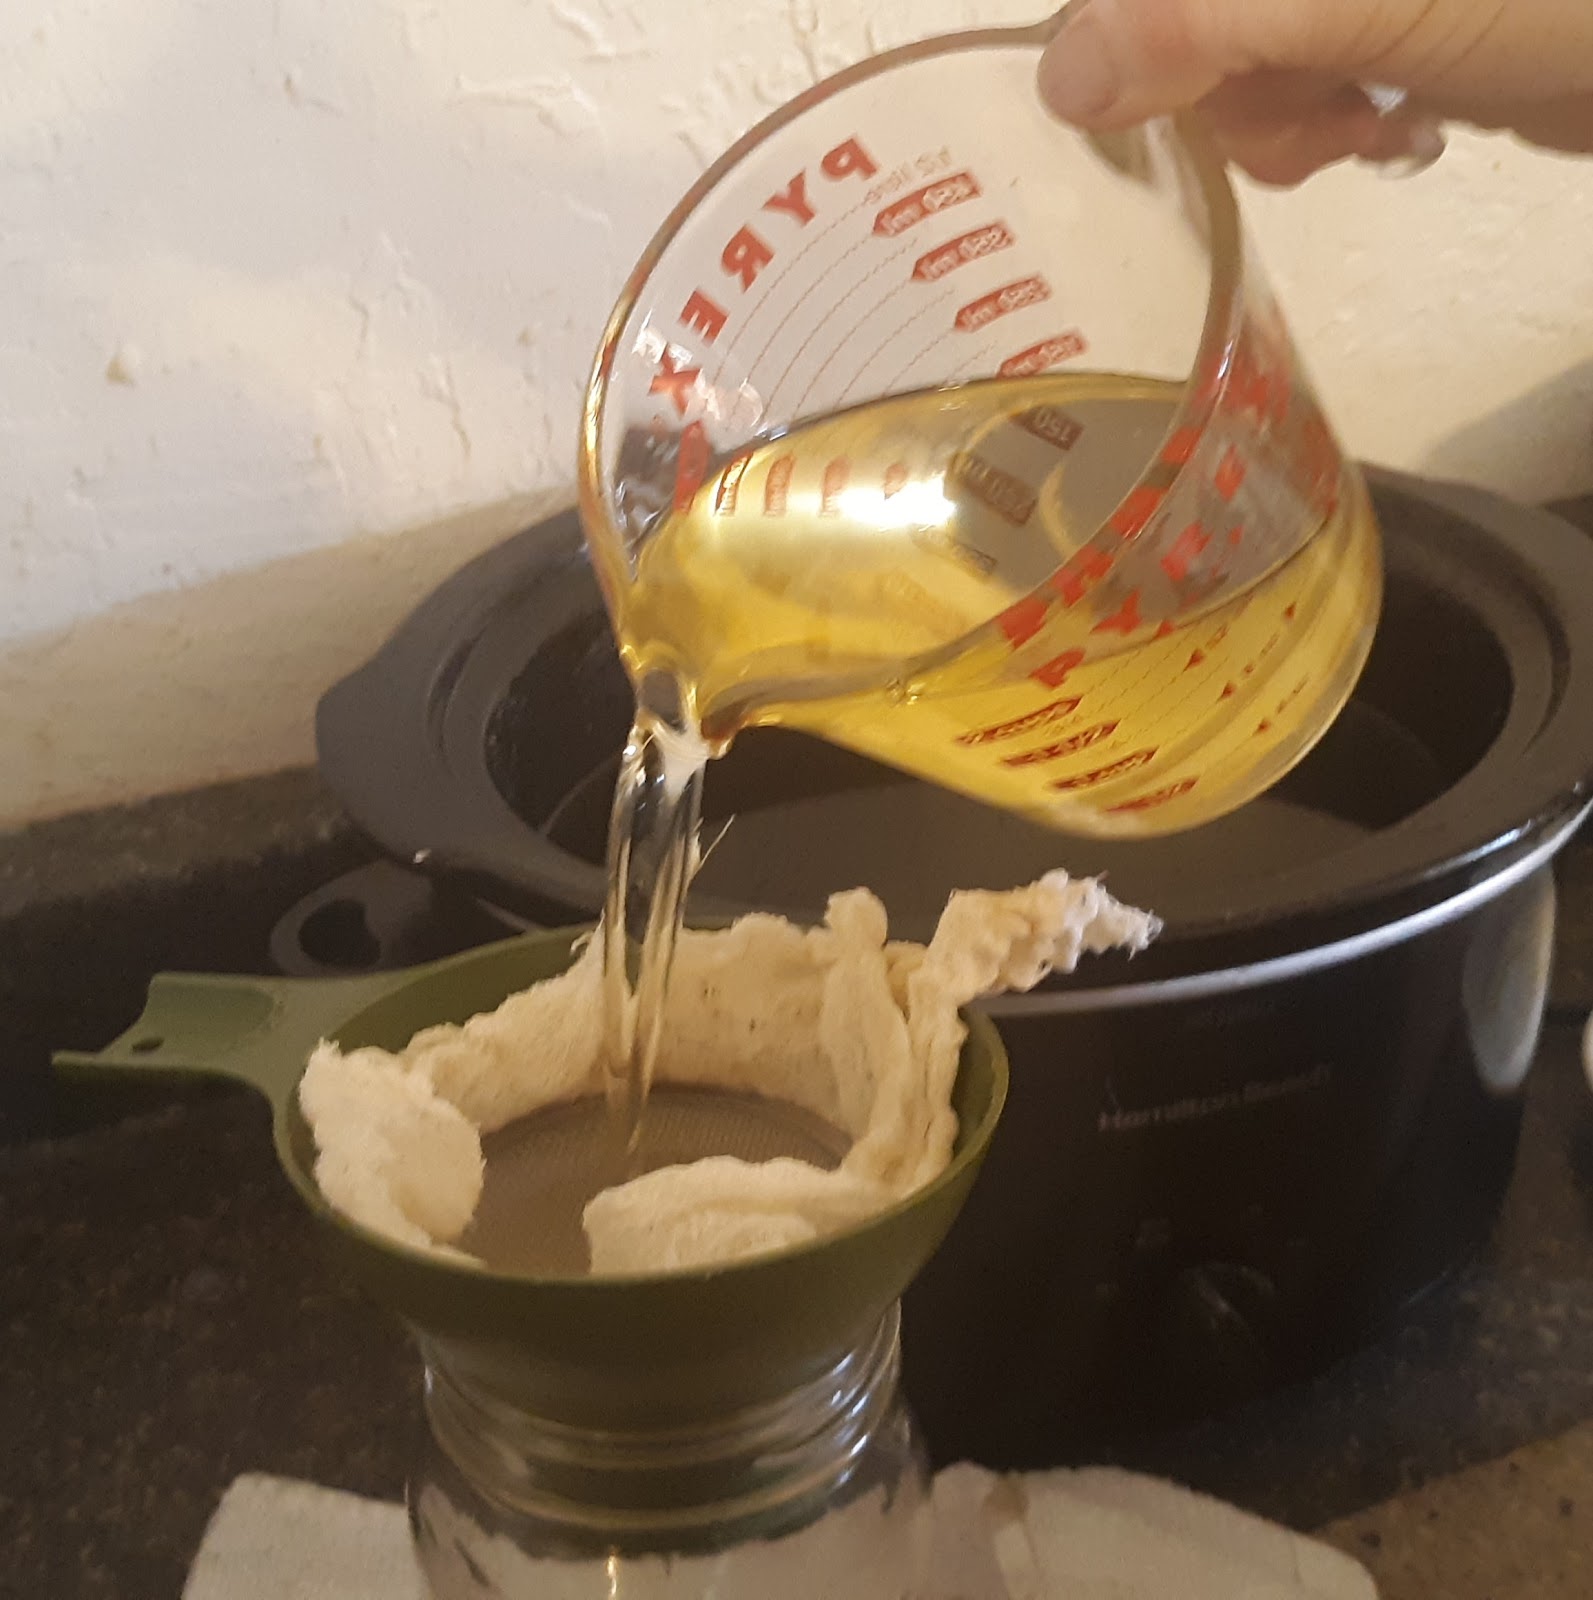
STEP 10: STRAIN THE TALLOW INTO THE BOWL (FIRST STRAINING)
- This is the messiest part. To save time and mess, carefully read through the following instructions to familiarize yourself with what is needed and have supplies on hand.
NOTE:
DON’T walk away from this in the middle. I have found this can cause cheesecloth to clog with tallow if allowed to cool in the jars halfway through.
- Tightly secure the cheesecloth over a clean bowl with a little slack.
TIP: I tighten up the edges of the cheesecloth to avoid spilling chunks into my CLEAN TALLOW. Do a little testing of your cheesecloth by slowly pouring and adjusting as needed. You DO NOT want to allow too much chucky fat to slip by this step. If more than a cup of chucky fat slips through, you may want to repeat the steps PRIOR to filling your jars.
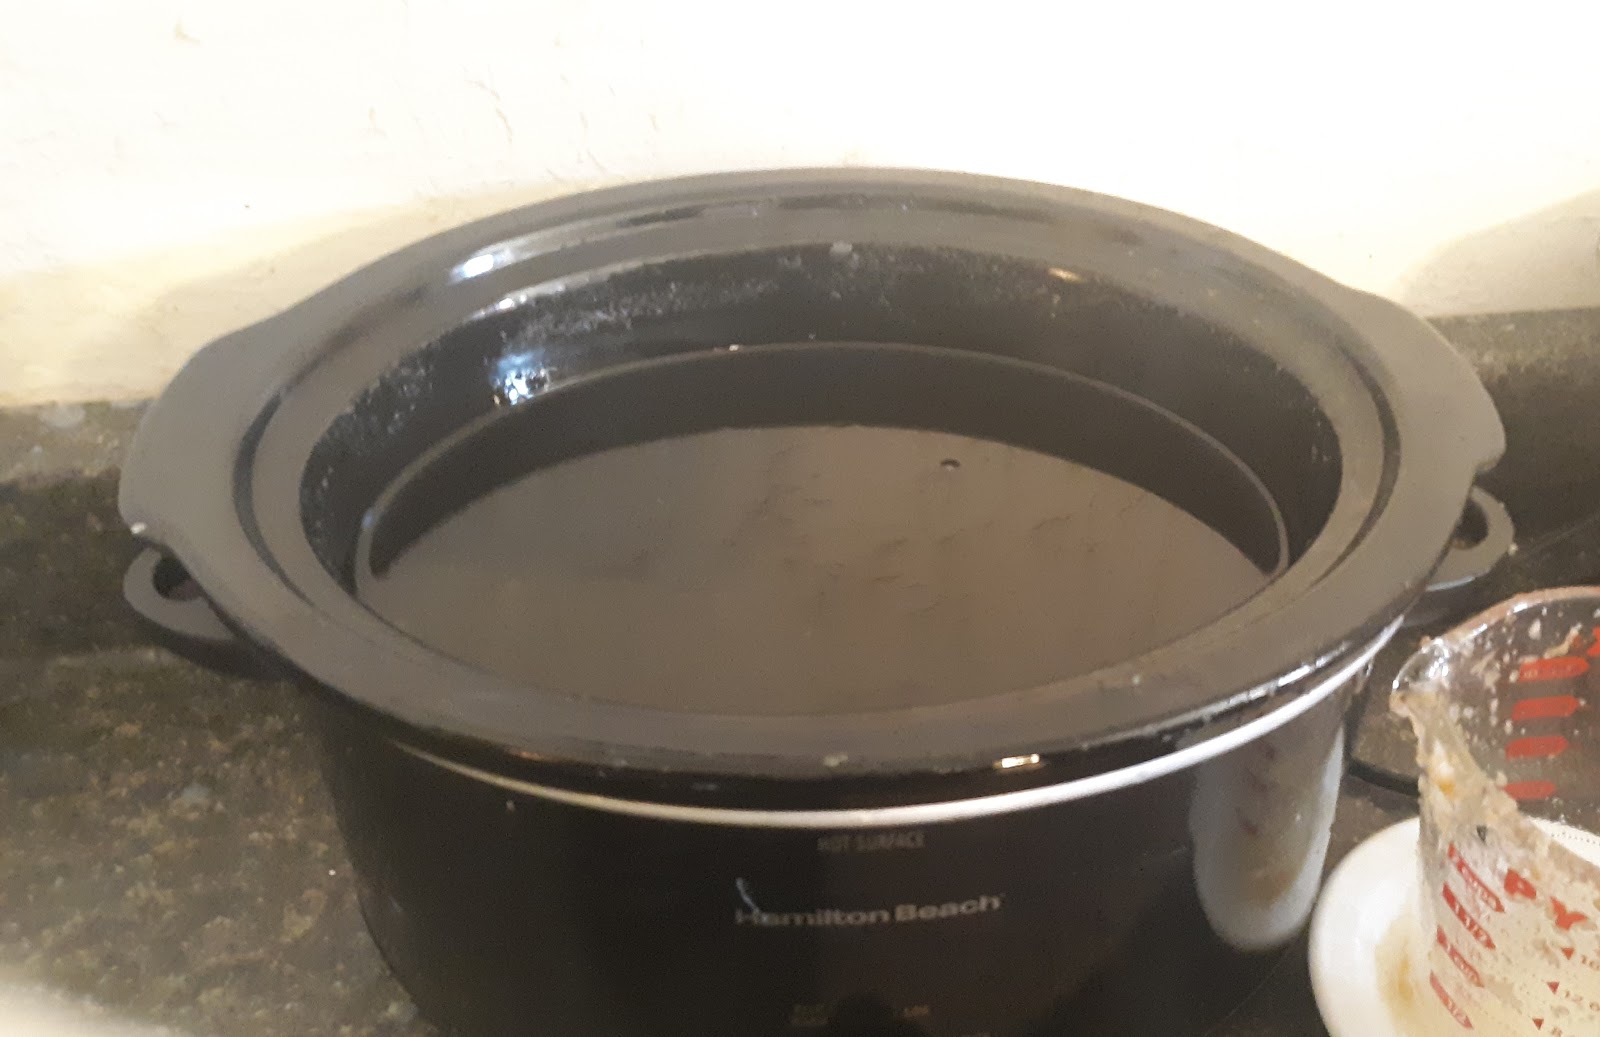
BOWL WITH CHEESECLOTH SECURED (I use my instapot insert with the rubber lid seal around it like in the picture)
- Slowly scoop out liquid tallow avoiding as much of the small chunks as possible at first.
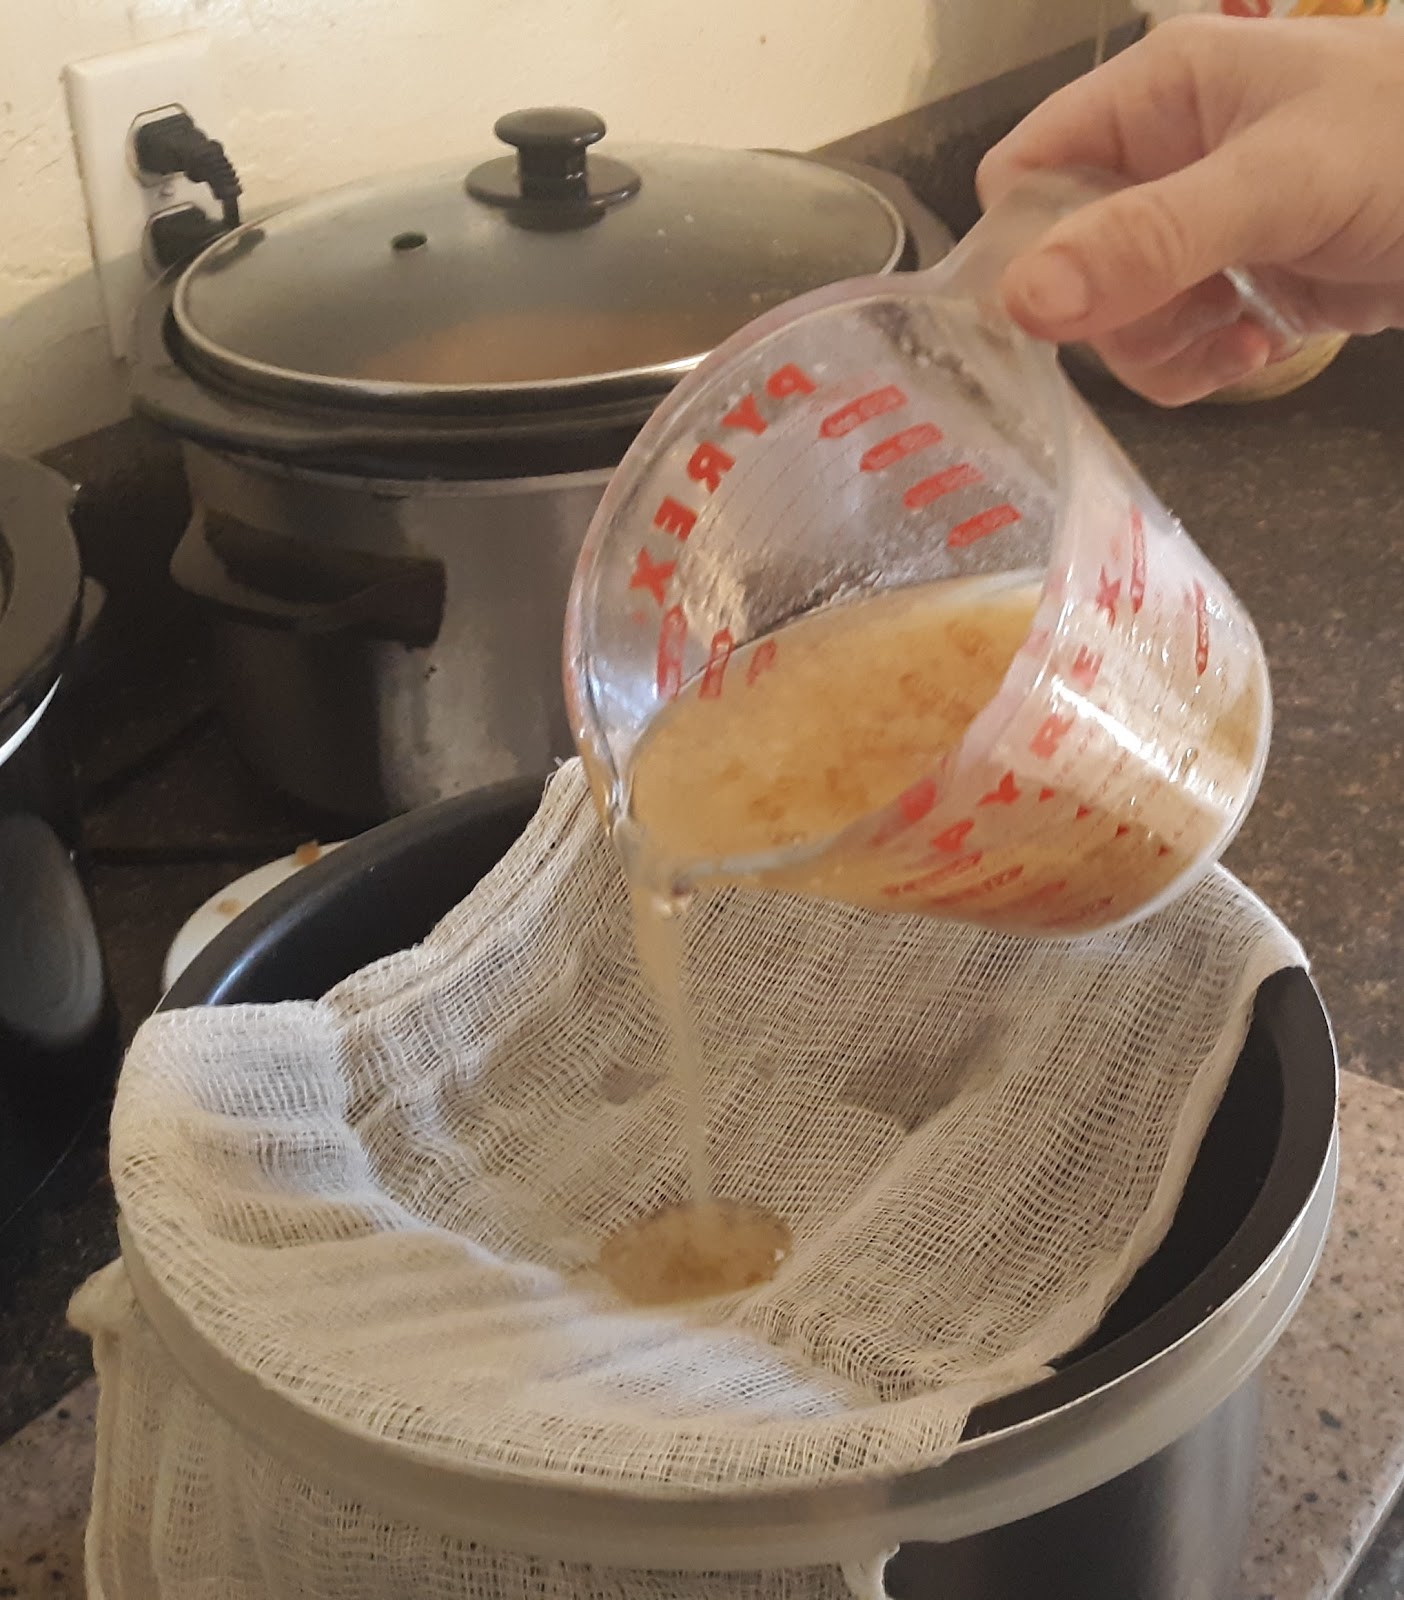
- TIP: SCOOP rather pouring liquid tallow avoids excess dripping of greasy tallow,
- Slowly pour through the cheesecloth into the bowl.
- Let it drain well but DO NOT LET IT cool as this will clog your filter and you MAY need to toss and get more cheesecloth. If this happens, try removing excess chunks and pour more hot tallow though it.
- As your straining gets full of chunks, carefully remove and dump into the discard bowl to work with later.

REMOVING FAT CHUNKS FROM CHEESECLOTH
REMOVED FAT – WILL RETURN TO HEAT AND REFILTER ONE MORE TIME
- Continue until your rendering pot is empty and use a spatula to remove remaining loose chunks. The cleaner the CHEESECLOTH FROM LOOSE CHUNKS the better as they fall into clean liquid when pouring. Wipe with a clean paper towel if needed.
- Carefully remove excess fat chunks from your cheesecloth. I find a spatula works great use the same paper. You don’t want chunks falling into your clean liquid
- Then carefully pour strained tallow back into warm crockpot to keep warm while filling jars.
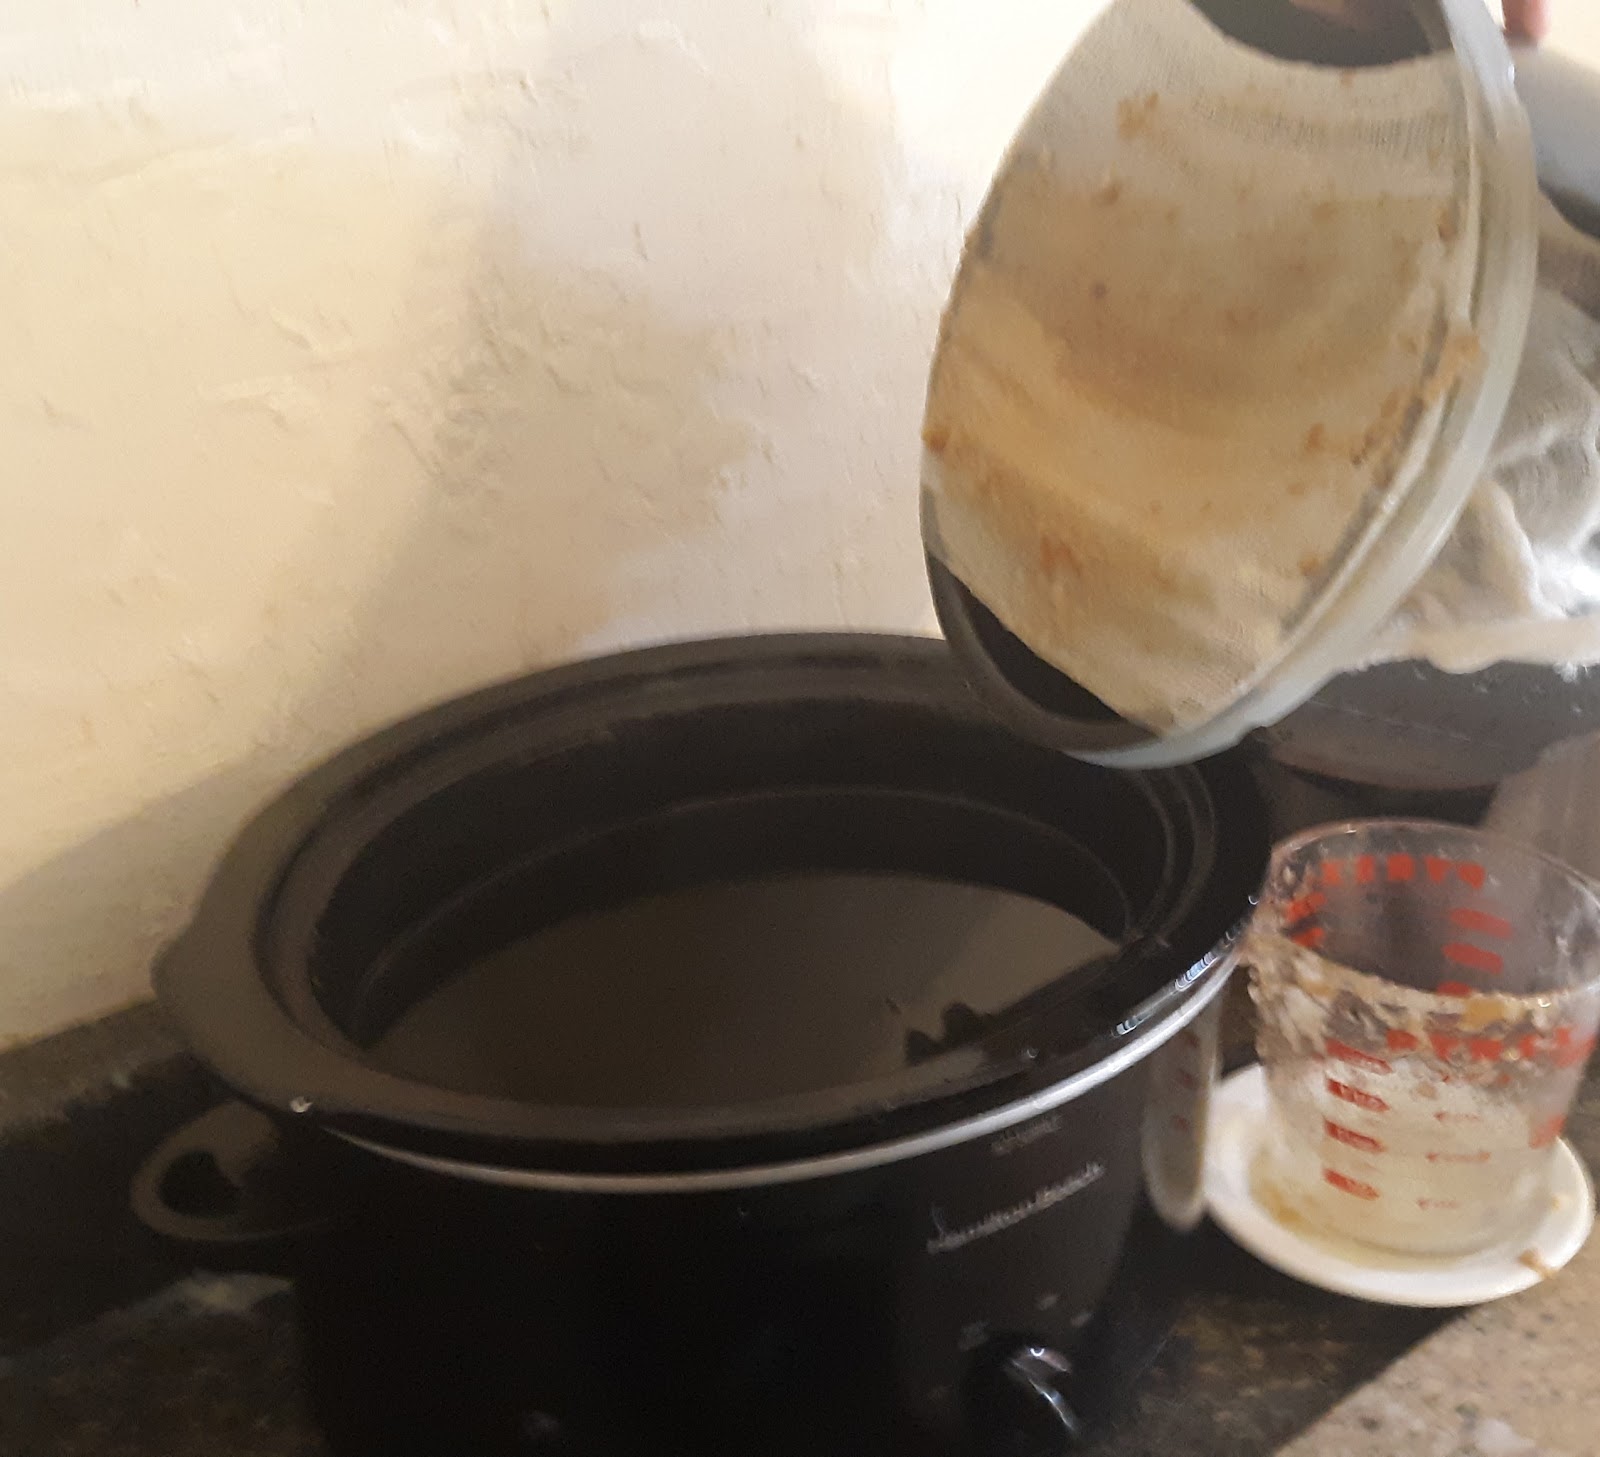
- Your tallow should now be free from chucks and very clean and clear like the picture. It is ok for a few small chunks but be sure to catch them in the second filtering when filling your jars.
BOWL OF FAT CHUNKS
- SET ASIDE BOWL FOR FIRST FILTERING FOR THE FAT CHUNKS
NOTE:***DON’T be tempted to skip the first filtering process and filter directly into your jars, be assured, you WILL prevent a headache, mess and save time by using both filtering processes due the mess created by the excessive amount of solids that can slip by your filter in the funnel each time you clean it out (which is needed almost every scoop). I have tested both ways while learning and the 2 filtering method is by far the easiest, cleanest and fastest method I have tried.
BIG MISTAKE BY SKIPPING THE FIRST FILTERING SLOWS PROCESS DOWN AND ALLOWS TALLOW AND CHUNK TO COOL WHILE CONTINUALLY CLEANING AND DUMPING THE FUNNEL AND SMALL CHEESECLOTH FILLED WITH CHUNKS. NOT TO MENTION THE GREASY HANDS AND EQUIPMENT AND THE OTHER BLOOPERS THAT CAN OCCUR. IF NEEDED TOSS ALL THE CHEESECLOTH AND GO BACK AND START STEP 10 AGAIN.
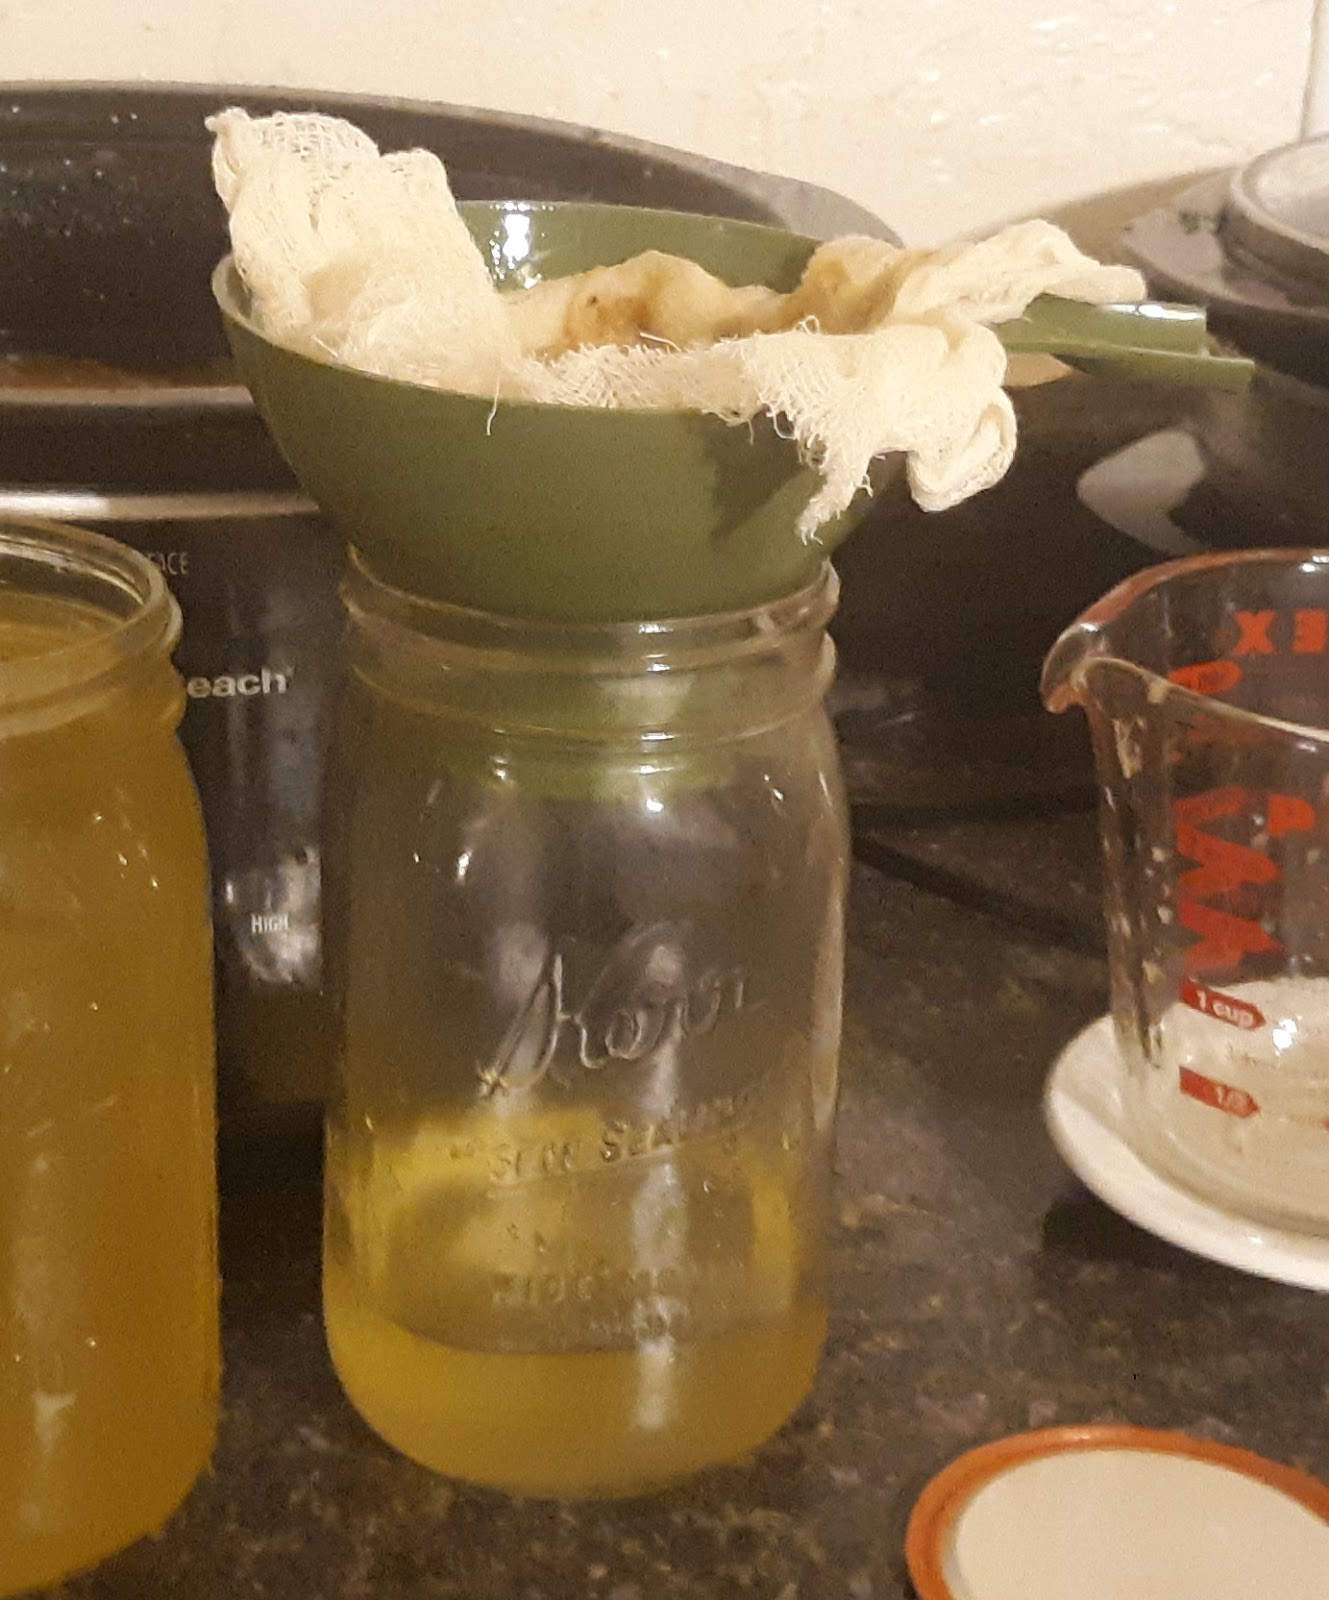
STEP 11: FILL YOUR CLEAN HOT JARS WITH HOT TALLOW
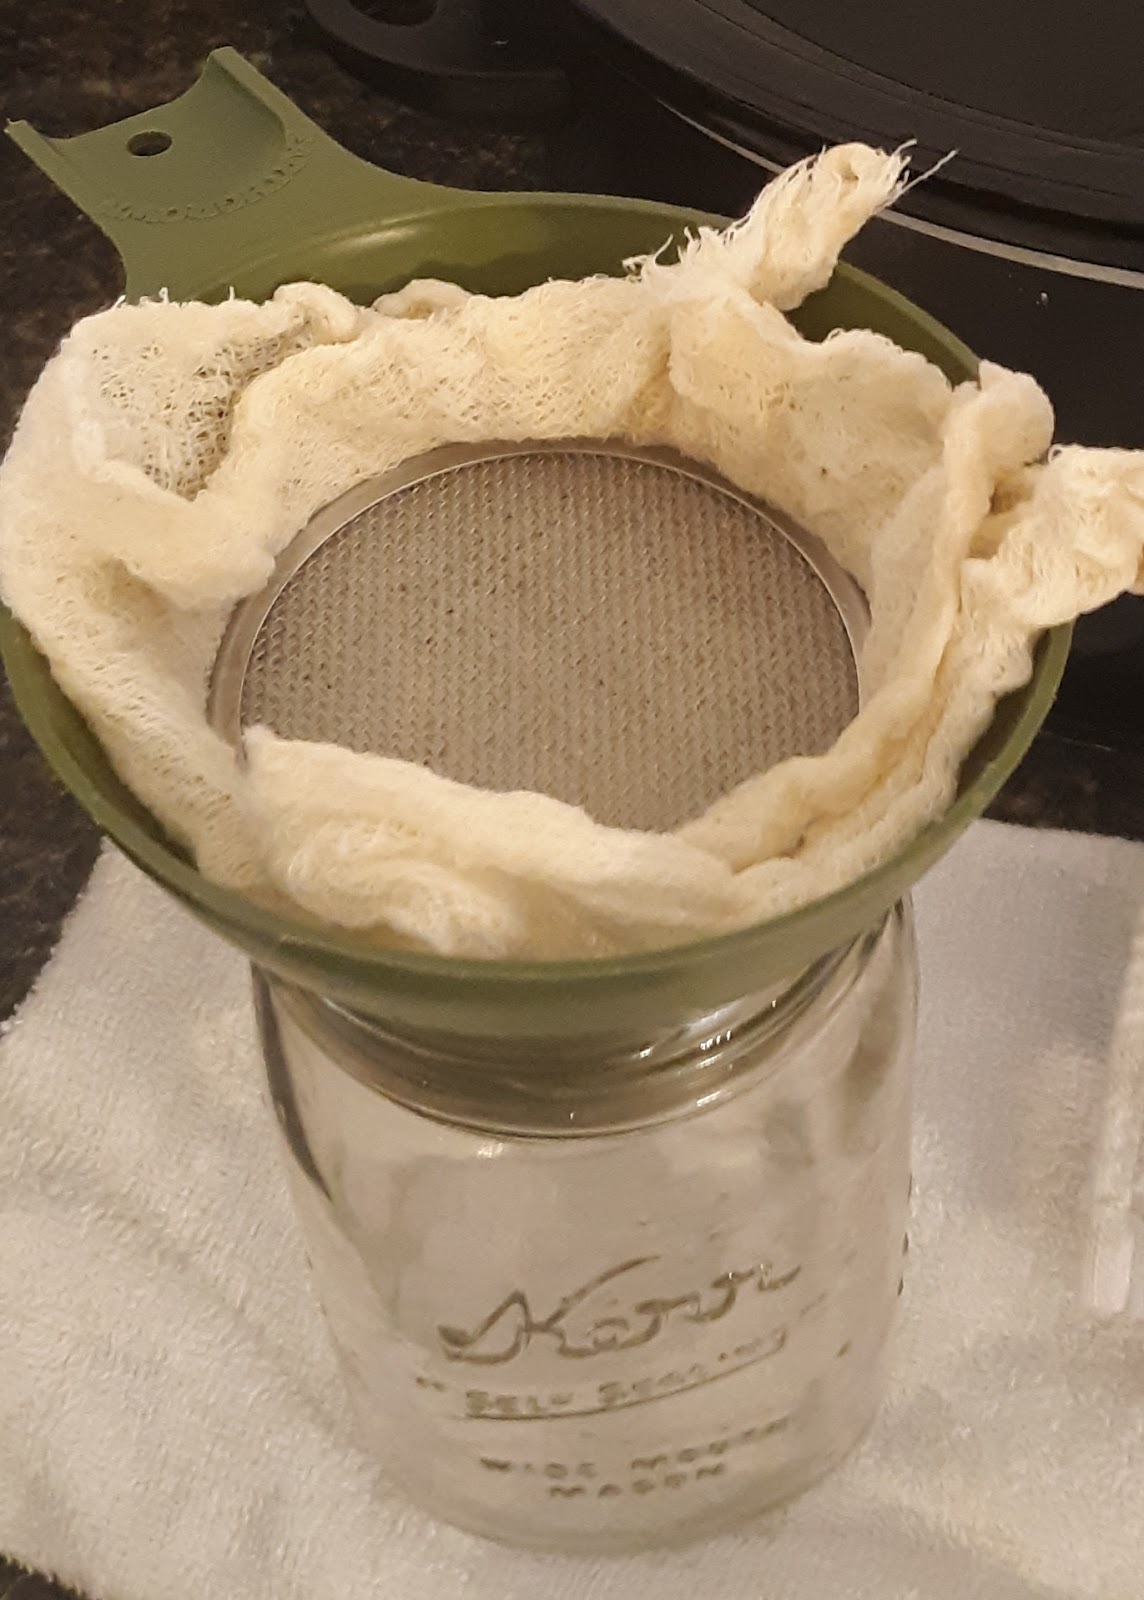
- Set up your small cheesecloth to cover your canning funnel
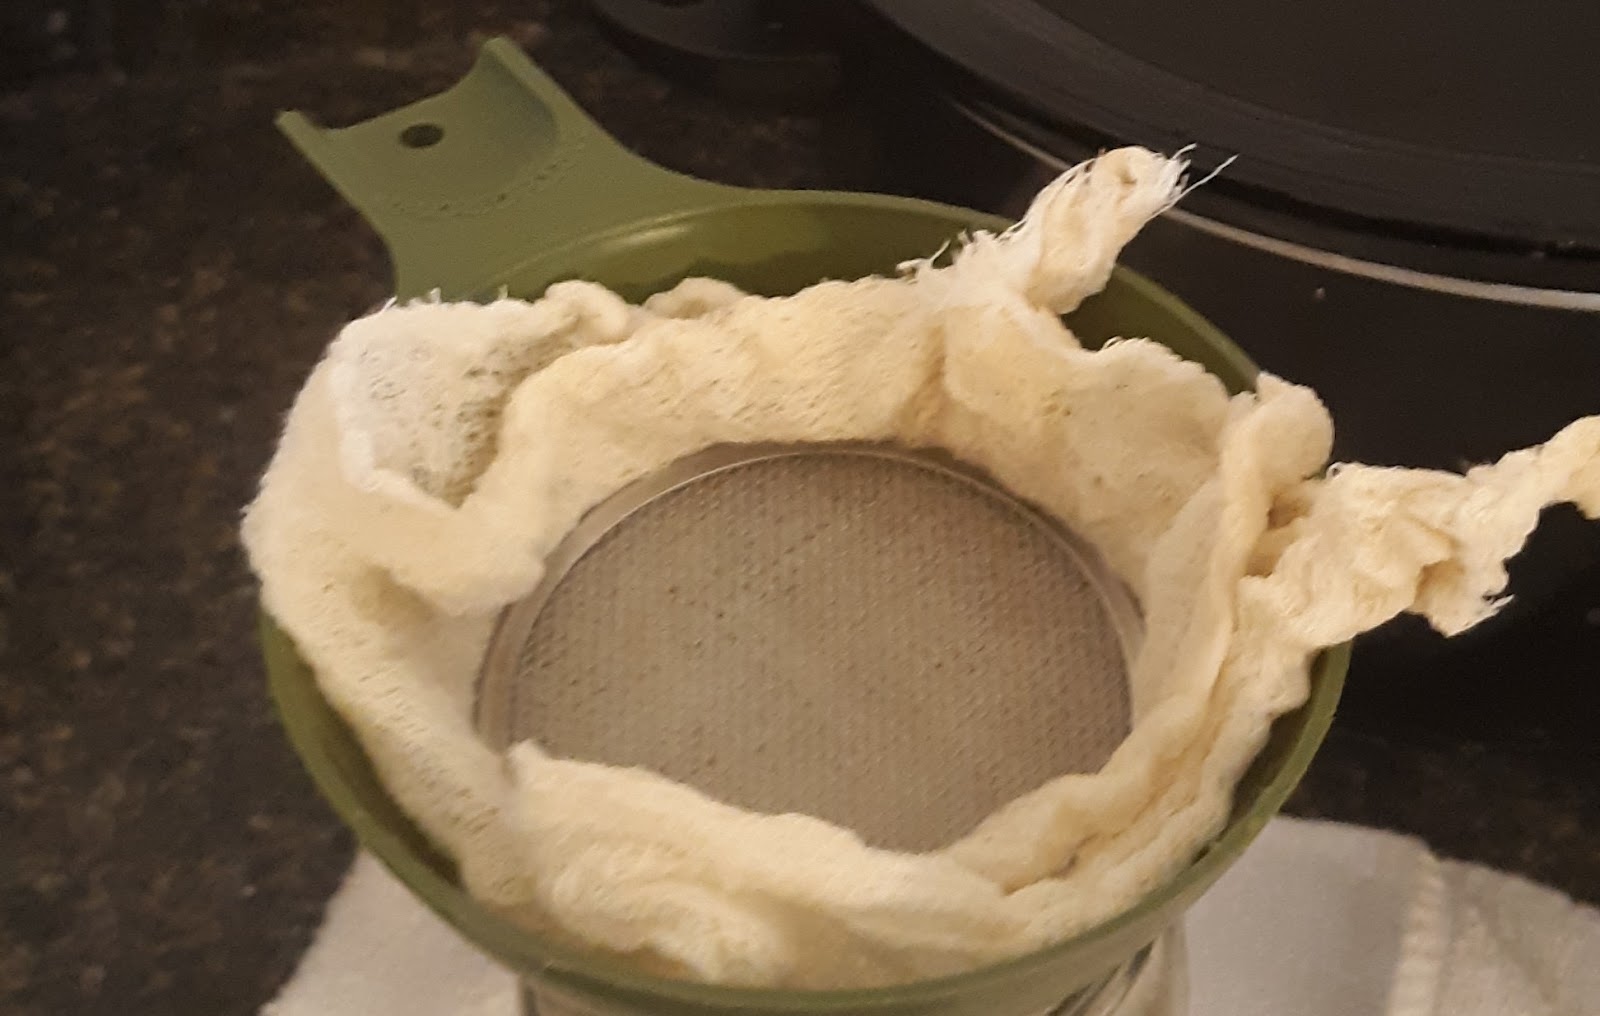
- Make sure your scoop is clean and dry.
- Use a paper towel to completely dry the inside of ONE of your jars. (if you have large hands, you may recruit smaller clean hands or use a utensil handle and a few extra paper towels to remove all the water.
- Place the funnel and cheesecloth into your jar.
- With your clean scoop – carefully pour your tallow through the funnel paying attention to your liquid level.
NOTE: To insure a good seal and clean tallow- DON’T walk away from this in the middle. I have found this can cause premature spoilage of tallow if allowed to cool in the jars halfway through.
- 1 inch headspace
- Once jar is full get a HOT lid and place it on CLEAN RIM of the jar.
IMPORTANT NOTE: DIRTY GREASY RIM – If you may have dripped tallow down the funnel or overflowed you will want t use a Hot damp clean cloth to carefully remove grease from the rim. OR start with a separate clean jar with funnel and pour hot tallow avoiding grease on the rim.
- Place ring over lid and tighten finger tight. (I like to rotate jar to ensure tallow covers the lid and other area inside the jar and seal better.) Set aside to cool.
- REPEAT STEP 11 UNTIL ALL FILTERED TALLOW IS IN JARS.
- If you stop here, you may want to keep refrigerated up to 5 weeks and frozen for several years or 3 years potentially on a shelf for soapmaking purposes)
OPTIONAL STEP
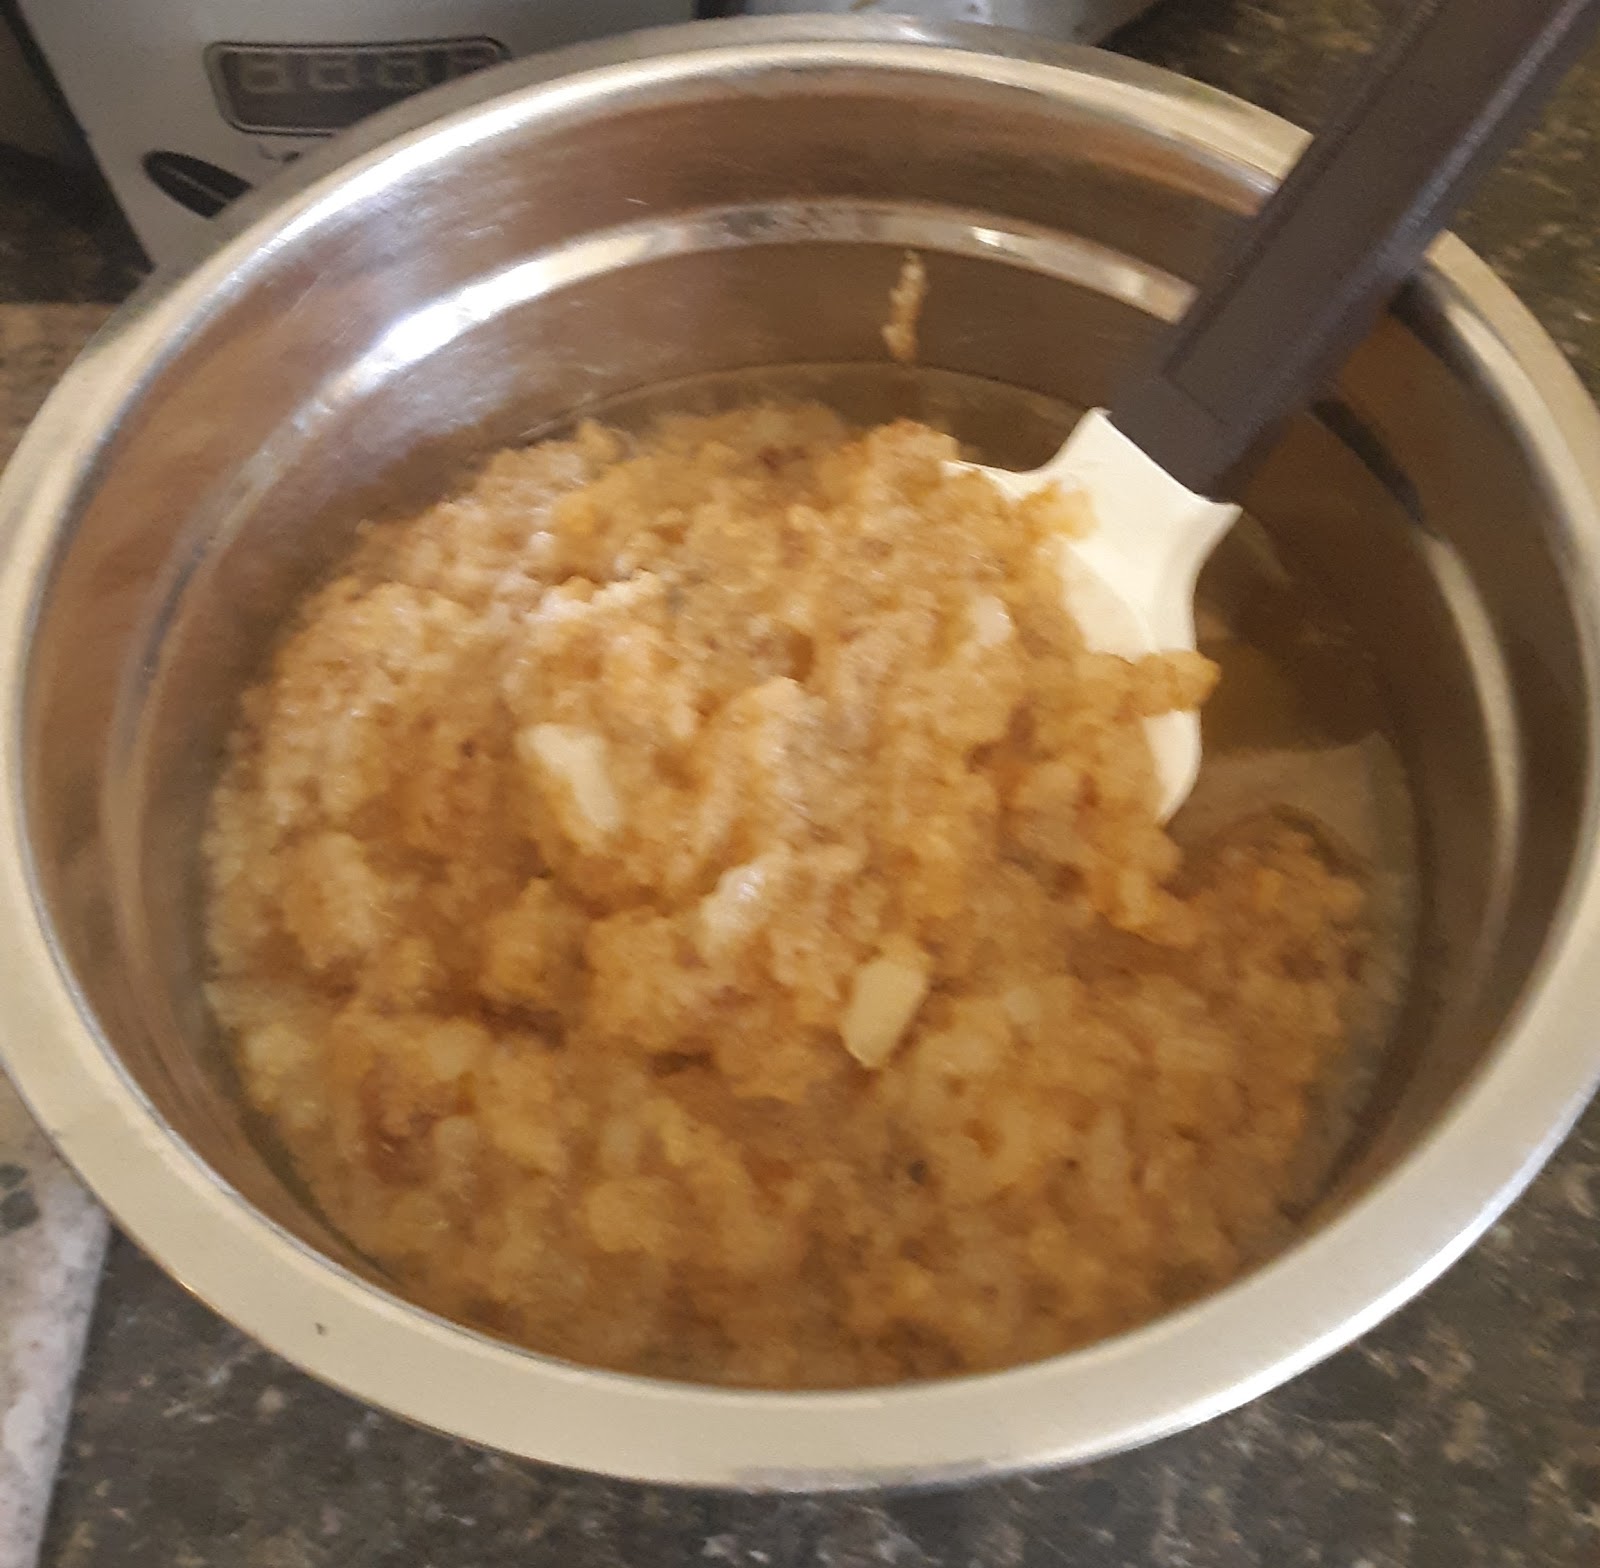
- Return filtered fat from your discard bowl to a heat source to separate the remaining liquid from semi solids fat. Mix well to separate
- Clear
STEP 12: OPTIONAL Finally, get the remaining tallow from your bowl of chunks before you discard. I do this if I need a little more to fill a jar or to set aside and use right away.
- REPEAT STEP 10 WITH THE WARMING FAT CHUNKS.
- Use a spatula to pres down fat into cheesecloth
STEP 13: Pressure canning (For a food safe long term storage method)
- Prepare your pressure canner
- Fill stovetop pressure canner with 2 inches of water.
- Turn the heat to medium-medium high.
- Place the metal rack on the bottom of the pan.
- Add hot jars to hot water
- Secure lid on your pressure canner.
- Once you get a steady stream of steam from your vent, place the weight over the vent and watch for pressure to reach 10 pounds of pressure.
- Once the pressure reaches 10 pounds. Adjust heat to keep it steady and set the timer for 25 minutes. (This is based at sea level- adjust according to your pressure canner instructions and your sea level so at 2500 feet above it is 35 minutes need to verify on my list)
- Once the timer is complete, turn off heat and remove if necessary.
- Once pressure reaches 0 pounds remove lid
- Remove jars when able and place on a towel in a draft free area to avoid cracking jars and let cool for 24 hours. You can also wrap the towel around them to protect from any cool draft especially in cooler months.
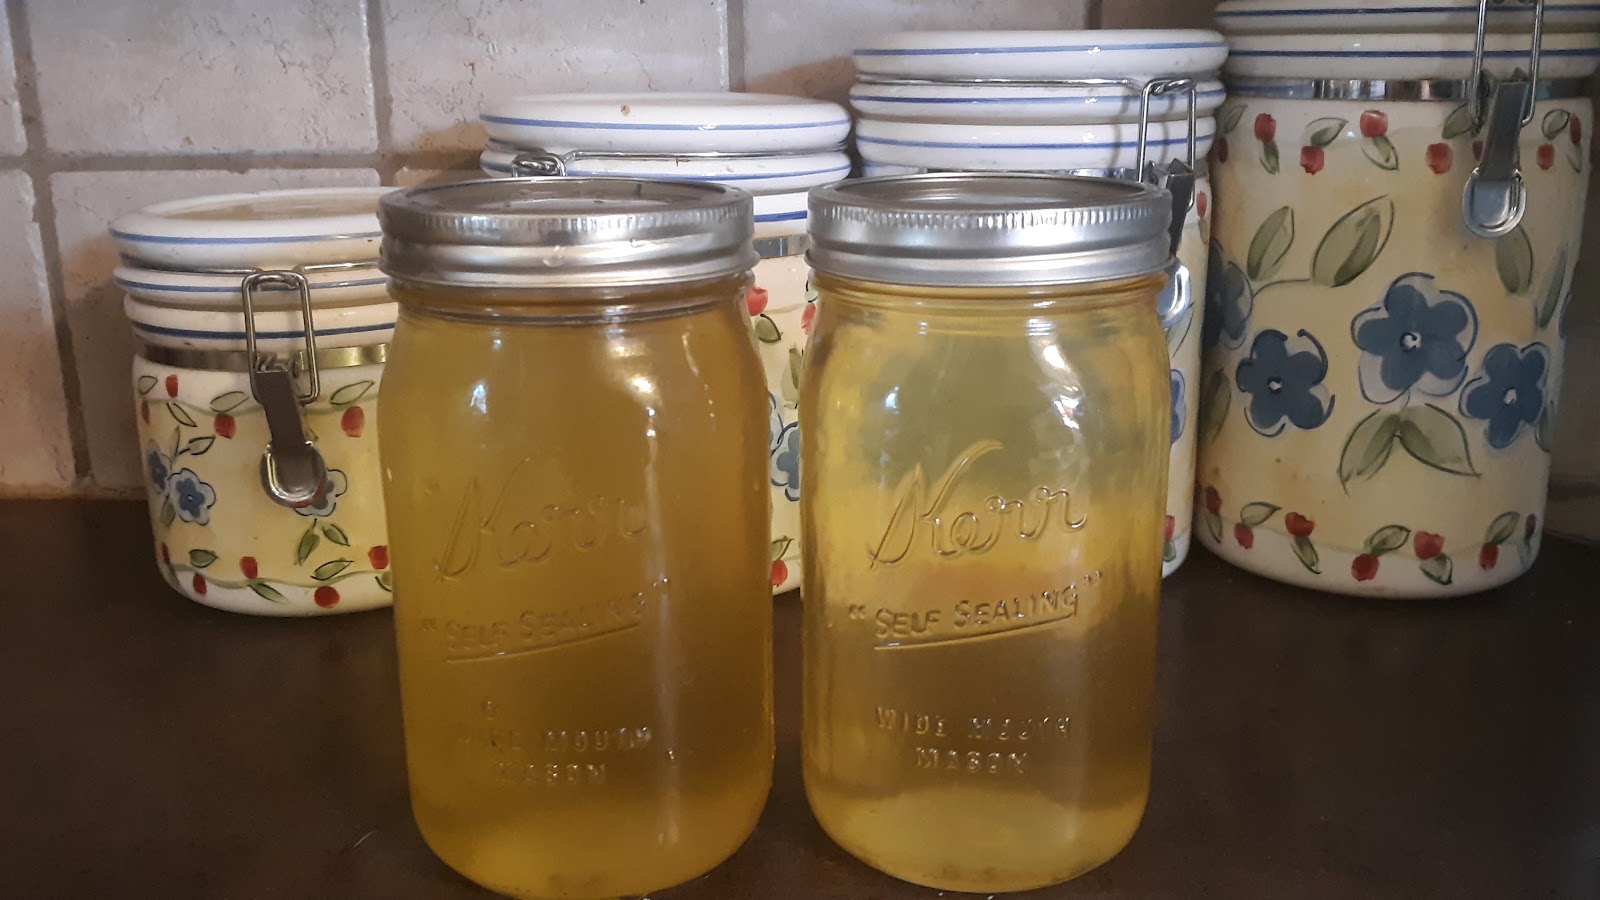
Hot tallow will be clear like canola oil.
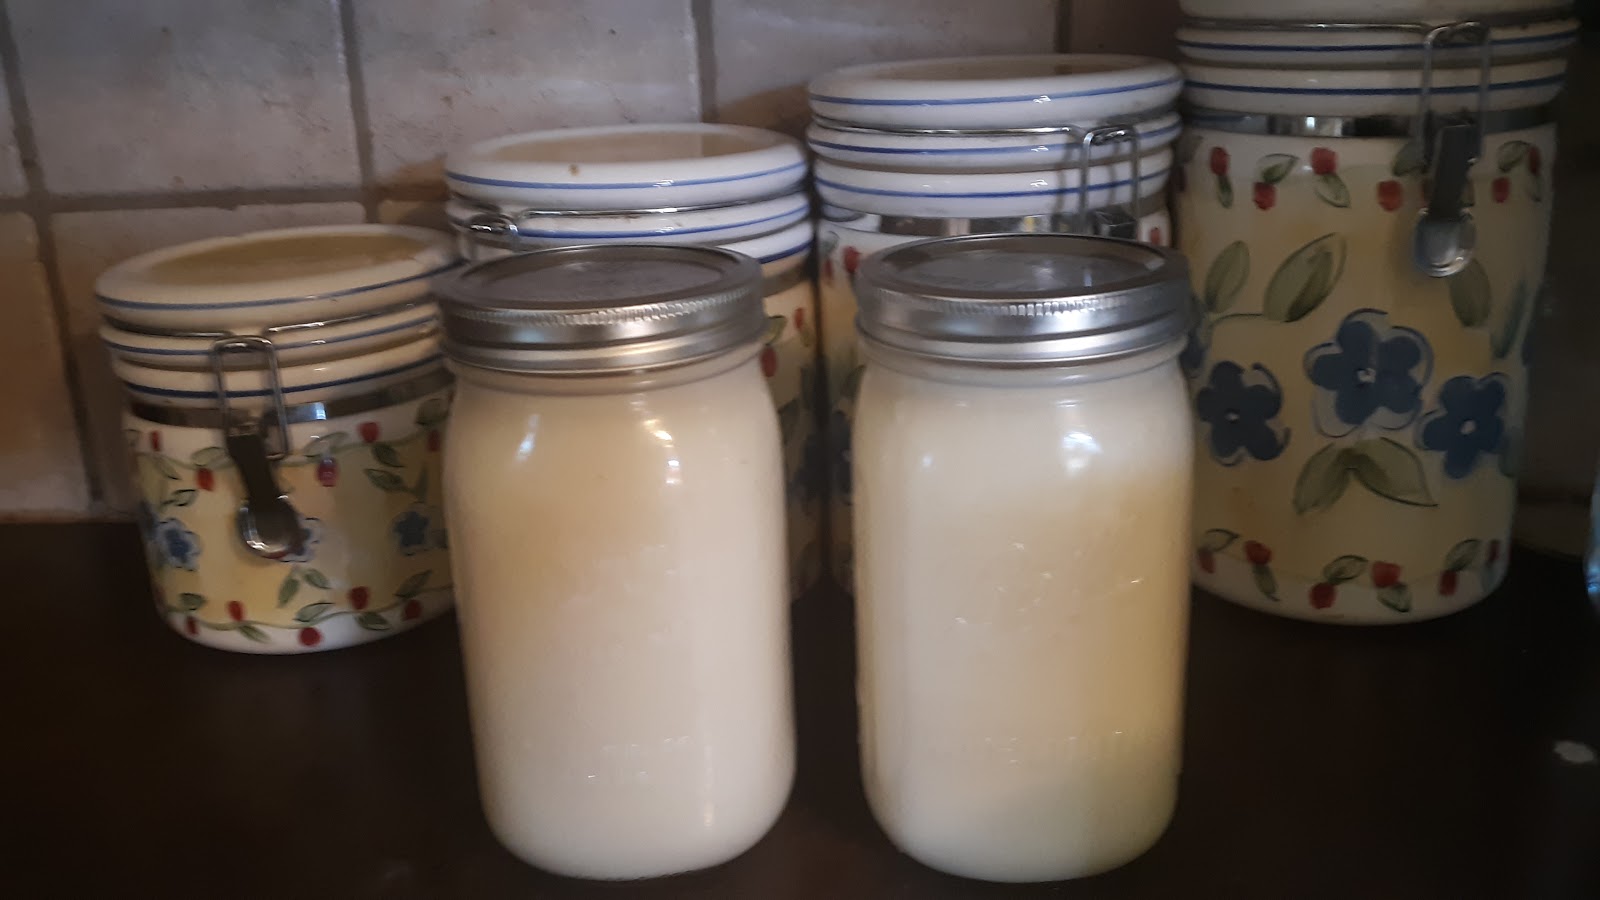
Cool tallow will be white and opaque
STEP 14: Clean and Label your jars
- Once cool, check seals, if button is popped up or lid is loose, refrigerate to use promptly or freeze for long storage..
- Clean the jars and rinse well with warm soapy water
- Label lid: BEEF TALLOW and DATE OF RENDERING and CANNING METHOD
© 2021 All Rights Reserved.
SHOP AZURE

